วันอาทิตย์ที่ 1 กุมภาพันธ์ พ.ศ. 2552

Bridal Makeup

Bridal Makeup--Hairstyling,Facial Makeup,Clothes and Jewellery,Aids For Bridal Makeup...

Bridal Makeup

Bridal makeup depends much on her sisters, sisters-in law and her friends because a bride does not decorate herself for her marriage. Nowadays it is a fashion to visit a beauty parlour to get an expert advice. Every woman, therefore, must have knowledge of bridal makeup and of things required for it, because beauty clinics are not available in small towns or villages.

For an immaculate make-up a soft, smooth and lustrous skin is essential, and hence a couple of weeks before the wedding day great care is taken to look after it. Homemade concoction called ublan, and a good facial give the required softness to the skin. Blackheads can be easily removed by steaming. For a fresh look, use some skin tonic or astringent lotion.

It is necessary to decorate hands in the morning on the wedding day. Make nails soft by dipping them in lukewarm water mixed with soap and soda bicarb. Rub the nails with a filler to give them the desired shape. The dead skin on the nails can be pushed back with a nail-pusher or an orange stick, after applying olive oil on that part. Cut off the dead skin with scissors. Massage the arms with a cream. Wash hands with luke­warm water and apply hand lotion so that they get a soft and smooth look. Polish nails with nail-polish. Decorate your hands with mehandi just one day prior to the wedding day.

Now, scrub the feet and apply 'alta' or mahawar. One can visit a parlour for 'manicure' and 'pedicure' one day prior to wedding, if possible.

Hairstyling


A good hairstyle can be done only if the hair are not oily. So, shampoo them before makeup. Put them in rollers when wet and then dry them. Long hair as well as short hair both can be put in rollers. Remove rollers when hair are dry. They will be wavy, and can be set well. Now, draw forth smaller locks and do 'back combing'. Part your hair from the middle and make waves on both sides. A bride should have parting in the middle which matches well when decorated with beni or matha-palli. After setting the front hair, tie a beautiful bun. For shon hair, you can use ready­made 'switch'. Hair spray will set the hair well and lend them lustre.

Facial Makeup


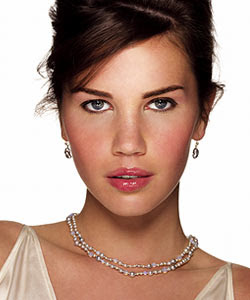
Clean the face and use base cream, then foundation. If there are spots or shadows, hide them by applying light-tinged foundation or white lipstick on that part. Do not forget to apply foundation on the neck otherwise neck will appear darker than face. Now put liquid rouge with a brush on the upper part of cheeks and rub it down gently, it gives flush to the bride's face. Apply compact powder or face powder evenly so that it does not show in patches. Apply powder on the upper part of eyelids and on lips. Powder holds mascara and lipstick properly. After face, do eye makeup: Mascara for eyelids, eyeliner on the lashes and eye-shadow matching the clothes of brides. Blue eye-sadow suits the bride's red dress. Green and golden eye-shadow can also be used. Give shape to eyebrows with an eyebrow pencil. Put a bindi on the forehead - it could be round or according to the shape of the face. Bindi can be red, matching red dress. Forehead can be decorated with small dots above the eyebrows 'in the shape of half moon. Lipstick is put on last of all. Apply a light shade first followed by a darker shade. On lipstick use a lip-gloss, 10 ensure lustre. After completing this process use an as. tringent lotion so that makeup is retained for long.

Clothes and Jewellery

Although a bride looks beautiful in red dress, th, colours do vary as per provincial traditions. Moreover, they can be different in style; sart salwar-kamiz, lehanga-chunni, etc. Golden decorations on red dress give it a kind of gliner. Makeup is not complete withoutjewellery.Bem on forehead, zhoomer or matha-patti, nath 01\ nose, earrings, necklace, bangles, kangans, baju­band, rings, hathfool, payal and so on can be worn.

Aids For Bridal Makeup

* Cleasing milk, cream, astringent.

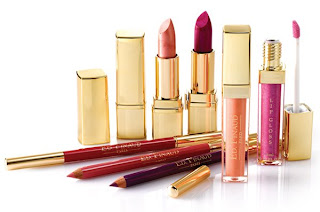
* Foundation, powder, liquid rouge, mascara, red and white bindi, eyeshaclow, eyeliner, eyebrow pencil. Nail polish, lipstick, lip-gloss.

* Nail filer, nail push, orange stick, hand lotion.

* Mehnadi (henna), 'altra' or mahavar.

* Blackheads extracter, hairpin, roller, switch, hair spray, etc.

* Wedding costume, ornaments and jewellery.

Article Source:http://www.makeup-artists.org/

Using The Cream Correctly

Using The Cream Correctly


It is often observed that women usually apply cream on their faces in large quantities without realising that they are simply wasting it, because piling cream on the face is not enough. Cream is an effective ingredient to keep the skin beautiful and healthy. It covers the skin with its oily crust preventing the cells from developing dryness. Cream should be in commensuration with your skin. So, one has to keep in mind the quality of one's skin-normal, oily or dry. According to the requirement, buy a high standard product, because sub-standard products, though less expensive, are harmful for the skin because of some chemicals used in them or the defective process which goes in their making.

The correct way to apply cream on your face in as under :-


Take cream on your finger, apply it and massage it slowly upwards to the middle portion of your face. Apply it on the middle of forehead and massage from the inward comers of eye­brows to outwards. Then, from the mid-point of the eyebrows, massaging with circular motion move down below eyes. Massage the nose from its upper part to downwards and then to nostrils, from nostrils to the temples. Now, apply cream on the upper lip and move towards the cheeks. Apply below the lower lip and move down till you reach below the chin. In the end, apply below the chin and massage downwards.

Every day after bath, clean your face with a cleansing cream or lotion. It removes dirt and opens the pores. Likewise, it cleans the particles of a previous makeup, and removes other spots, if any. Now when the skin is clean, apply cream and rub it in well so that it gets absorbed. Use a non-oily foundation, as far as possible. Cream should be used on the face, neck and on those parts which are exposed. In order to protect the skin from the heat-wave and the scorching summer sun, use some good sun-screening cream or lotion. It should be cleaned at night.

Article Source:http://www.makeup-artists.org/

Applying Powder

Applying Powder---Powder should be dabbed on the face slowly dexterously with a trained and steady hand. When applied with light pressure, it settles down in the pores...

Applying Powder

Powder is an effective beauty aid to make the skin look even soft and auractive. Powder is the last item of your make-up. It is available in two fonns-cake and powder. While choosing a powder, keep in mind your complexion, and choose a shade that goes with it, otherwise the two shades, one of your complexion and the other of your powder will not match. The skin will look blotchy. Do not use cake powder, if you have an oily skin, because it contains an oil-base. While using powder, be sure your locks of hair are not dangling on your face. Apply powder with a clean, cotton puff and discard the used one.

Powder should be dabbed on the face slowly dexterously with a trained and steady hand. When applied with light pressure, it settles down in the pores. Do not forget to use it on the neck. Dust off extra powder. A powder brush or a cotton wool pad are the best to dust it off. If powder is not well-set, the face looks blotchy. Powder gets stuck on eyebrows and eye lashes. Brush it off with an eye brow brush with an anti-clock wise movement (from the end of the eyebrow up­wards).

Article Source:http://www.makeup-artists.org/

How to Makeup?

How to Makeup---Today we am going to tell you how to apply basic make up.,The first step towards makeup is to have a spotlessly clean face and for this you have to use a cleanser...

How to Makeup?

Most of the letters we get these days are about make up. Every teenager wants to know how to apply basic makeup. Today we am going to tell you how to apply basic make up.

Here are some tips for applying makeup

1. The first step towards makeup is to have a spotlessly clean face and for this you have to use a cleanser. Clean your face thoroughly with a cleanser and then apply toner on the face with a clean piece of cotton wool.

2. Whether you have a dry, normal, oily or a combination skin there is a foundation specially made for you. For dry skin you get creamy liquid foundations. These contain extra moisturizers to help prevent further dryness of the skin. Normal skin will do either with liquid or creamy foundation. For oily skin use non-greasy cake foundation and on a combination skin use a foundation for normal skin or a shade darker than it. Apply the foundation cobbering all the areas of face and neck. Blend it thoroughly into the skin so that you look natural.

3. Now comes powder which has two uses-one to set the make-up for a long lasting matte finish and two ro absorb any shine that appears on the face. Take a clean place of cotton wool and dip it in powder and lightly pat and press the powder all over the face. Flick off surplus powder with a face brush.

4. Fill in the sparse areas in the eyebrows with a brow brush dipped in brown colour. Now go over them with a black eyebrow pencil. Now use the eye shadow. Eye shadow should only be used on the upper lids. Dip the brush in water then take a small amount of colour. Close one eye and place the colour close to and almost touching the lids. Now draw a soft line next ro the upper lash line with eyeliner. To draw the line, dip the brush in colour. Hold outer corner of the eyelid taut and draw a fine line as close to the lashes as possible beginning at the inner corner of the eye and finishing just at the outer corner with a light upward turn. To line lower lip take a Kajal pencil with the index finger, hold the lower lid down and away from the eye and draw a line starting at the inner corner of the eye at a point corresponding with the upper line and continue' along the lower eyelid just beyond the outer corner slanting slightly upwards as before. Now use the mascara. First brush the lashes downwards to remove any foundation sticking to them then upwards over upper eyelids. Mascara goes better under the fan. The lashes do not gum together due to air. Cover the brush with a light coating of mascara and stroke it on the lashes working from the base to the tips. The lower lashes should be tinted with colour. When the first coat is dry apply the second one. Finally go over the lashes with a dry brush to separate them and 'to remove excess mascara.

5. Apply the blusher on the cheekbones and see the colour blends well into the skin.

6. Finally apply the lipstick. Fashion the upper lip with a lip pencil start from the outer corner following the natural curve of the lip and work towards the center. Now draw the line on the lower lip. When the outline is clearly established fill it generously with colour. Now you are ready to take on the world.

Article Source:http://www.makeup-artists.org/

Cosmetic Sins

Cosmetic Sins---Lipstick on your teeth,Lipstick lines on the cheeks,Smudgy lipstick,Half eaten lipstick, Smudged eye makeup, .Chipped nailpolish,Ring around the lips,Streaking foundation....


Cosmetic Sins

Before we go down to the sins we commit while using cosmetics we should first bear in mind that we should not use anyone else's cosmetics.

They maybe contaminated and you may then fall prey to a variety of allergies which are very difficult to get rid of, or they may not look as good on you as they do on your friends, So never have a hard mentality. Be an individual and be yourself, then only you will look beautiful and attractive. Listed below are some sins while you use cosmetics and instead of looking smart and beautiful you look like a clown.

Use the quick fix solutions whenever you find yourself in the situation listed below.


1. Lipstick on your teeth

Solution: Never, bite your lips after using lipstick on them, otherwise with your lips your teeth too will appear red.

2.Lipstick lines on the cheeks

Solution: These usually appear on the cheeks when you keep your hair open, the strands of hair fly allover you while you are traveling and leave unseemly marks on the cheeks. Always tie your hair neatly when you are travelling. You can open them again when you reach your destination.

3.Smudgy lipstick

Solution: This mostly happens when you have a bad cold. Along with wiping your nose, you also tend to wipe your lips with the result the lipstick smudges all around your mouth. When you have cold, try not to apply lipstick. Even if you apply one go for a natural shade so that even if it smudges it does not show.

4. Half eaten lipstick

Solution: This mostly happens when you eat noodles or other oily things in restaurants. Along with the food many people tends to eat the lipstick too. Either eat slowly and carefully or carry a spare lipstick in your purse so that when you finish eating you reapply the lipstick on your lips.

5. Smudged eye makeup

Solution: Use waterproof eye makeup. If you don't have waterproof makeup then stop rubbing your eyes. Pat gently with your handkerchief if you feel itchy around the eyes.

6.Chipped nailpolish

Solution: Use two coats of nail varnish and make sure they cover the sides of the nails which chip first. Also try to buy a nail polish from a reputed company. These polishes do not chip easily.

7.Ring around the lips

Solution: Outline the lips with a pencil then fill in the lips with a lip brush. Blot dry with a tissue and then apply a second coat.

8.Streaking foundation

Solution: Always add water to the foundation and make it of thin consistency. Apply evenly on the face. Now put on a thin layer of powder. Wet your hands, stand under the fan and pat your face with your hands. Let your face dry. This way the foundation will never streak down your face.

Article Source:http://www.makeup-artists.org/